Vol. XI: Vaporizers: Know What You Give, Know What You Get
Learn why verifying anesthetic vaporizers and using a reputable service company is crucial for ensuring…
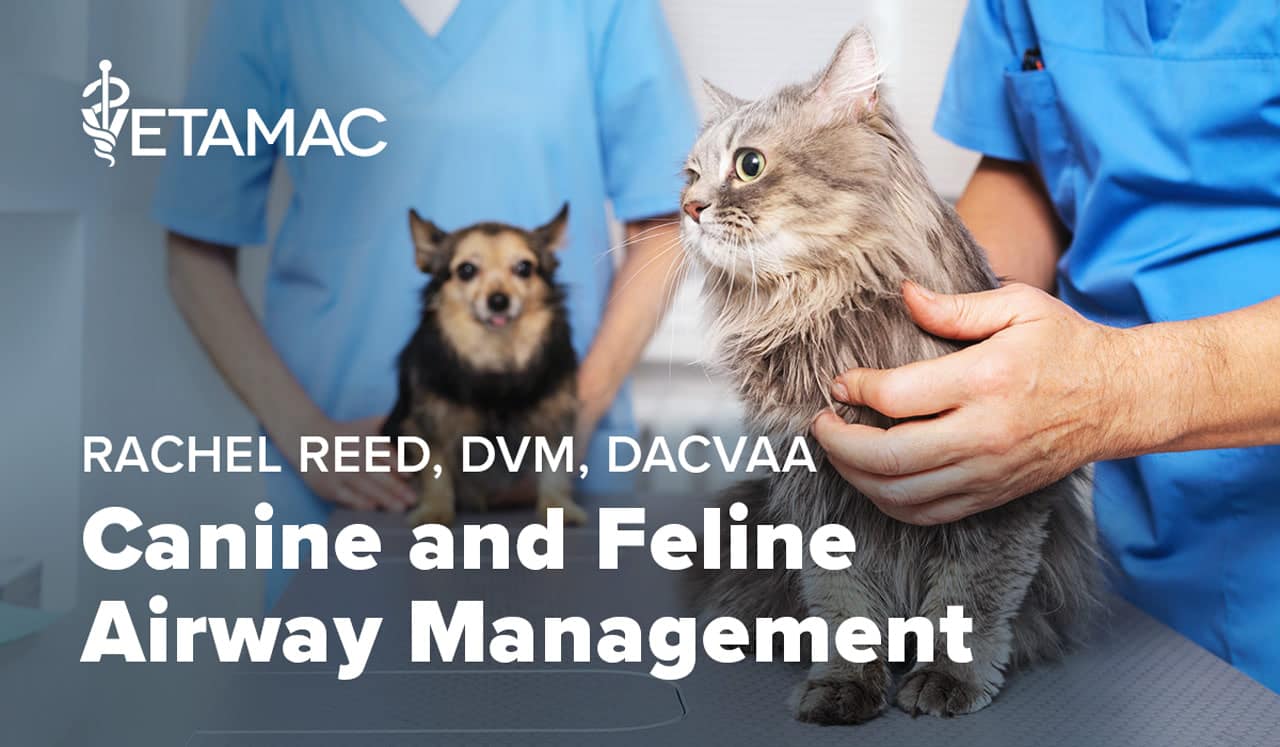
Patient airway management is a critical component of anesthetic care in dogs and cats. Although this topic may seem simple on the surface, proper airway management is critical for maintenance of oxygenation, ventilation, monitoring, and protection of the airway. Simultaneously, if performed incorrectly or without attention detail, inappropriate airway management can result in life threatening airway trauma and/or obstruction. Therefore, it is important that veterinary staff providing anesthetic care possess the knowledge and skills necessary to manage the airway appropriately. The following summary will provide a step-by-step guide for airway management in healthy dogs and cats. More advanced techniques are necessary for patients with complicated airways.
One of the simplest techniques that should be performed in every patient prior to induction of anesthesia in order to improve patient care is preoxygenation. Preoxygenation is achieved by administering 3-4 L/min 100% oxygen for 3-5 minutes ideally via a tightfitting facemask. This is generally easily achieved in a patient that is well premedicated. However, if the patient will not tolerate a facemask with a diaphragm, then utilizing an open facemask is an excellent alternative.

Preoxygenation allows for the oxygen concentration in the functional residual capacity of the lungs to increase from 20% to closer to 40%. Commonly used anesthetic induction agents such as propofol and alfaxalone reliably cause dose-dependent hypoventilation and apnea. In patients that have not been preoxygenated, this means that following induction of anesthesia, the patient will stop breathing and rapidly become hypoxemic if the anesthetist does efficiently intubate and ventilate the patient. In patients that have been preoxygenated, the time until development of hypoxemia is much longer, allowing time for the anesthetist to intubate even in scenarios of difficult airways that are challenging to intubate. Recognizing that the anesthetist does not know how difficult the intubation will be until actually inducing anesthesia and looking at the airway, it is prudent to preoxygenate all patients that will tolerate it, in preparation for whatever challenges the intubation may hold.
A critical concept that all veterinary staff performing endotracheal intubation in any species should understand is that airways are fragile. Every piece of equipment that is utilized to capture a patient’s airway should be utilized carefully and any contact with the patient’s airway should be gentle. Nothing should ever be forced into an airway and once an endotracheal tube is in place, it should ideally not be twisted or adjusted in any way.
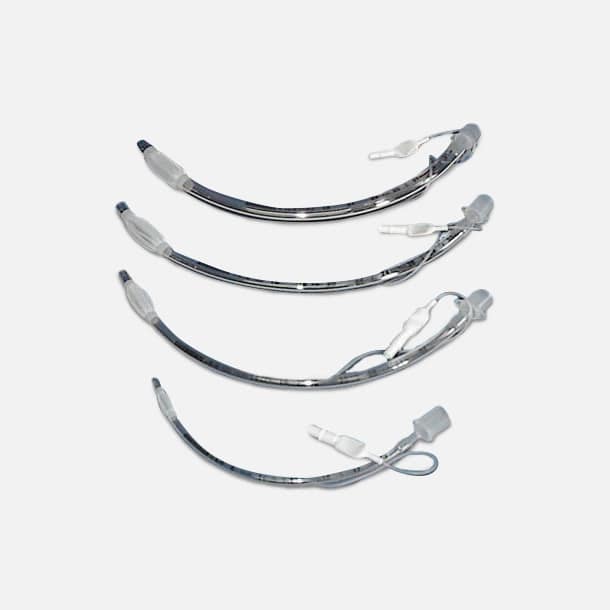
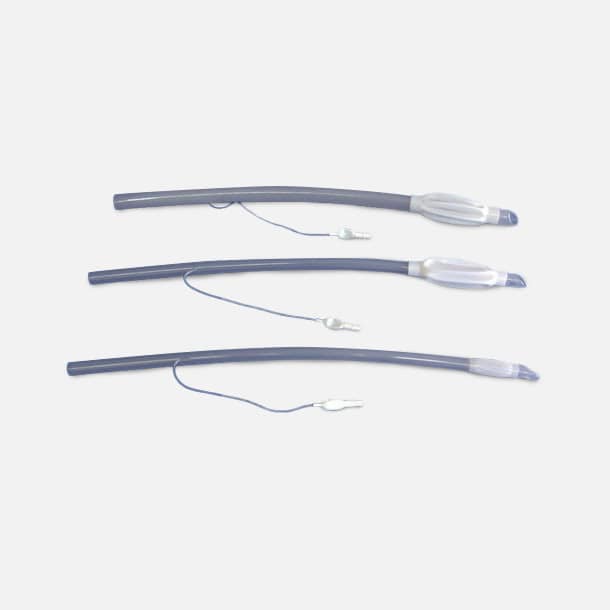
Endotracheal tubes commonly used in small animal anesthesia include the curved polyvinyl chloride (PVC) type endotracheal tubes and the straight polypropylene tubes. The PVC style tubes are designed for intubation of human patients with a curve that allows for easy advancement through the airway, a bevel that allows for insertion between the arytenoids, and a Murphy eye which allows for continued airflow should the tip of the endotracheal tube become obstructed. Polypropylene tubes are straight but still have a beveled tip and Murphy eye.
When selecting an endotracheal tube for a patient, the ideal size of tube is one that will fit easily into the airway and create a seal even without inflation of the cuff. There are several ways to estimate the size of tube the patient needs. The most accurate way to determine endotracheal tube size is to measure the internal tracheal diameter directly via a pre-existing thoracic or cervical radiograph. Patients often do not have pre-existing imaging, and therefore this technique is often not possible.
Another way to estimate endotracheal tube size is to palpate the trachea within the soft tissue of the neck and then choose an endotracheal tube is appropriate. Historically, anesthetists have estimated endotracheal tube size by examining the space between the nostrils, but this is not an accurate way to estimate endotracheal tube size and will invariably lead to placement of a tube that is too small.
After selecting the tube that is thought to be an appropriate size, one should also prepare 1-2 endotracheal tubes smaller and 1-2 endotracheal tubes larger. Each tube should be checked prior to induction of anesthesia to ensure that the cuff is competent by inflating the cuff and inspecting for leaks. At this time, the anesthetist should also premeasure to determine how far into the airway the endotracheal tube should be inserted. Murphy style endotracheal tubes have length markers that represent centimeters from the patient end of the endotracheal tube. Holding the endotracheal tube up adjacent to the patient’s head and neck, the anesthetist can determine to what depth the tube should be inserted in order for the tip of the tube to be at the level of the thoracic inlet. This depth should be noted for proper placement at the time of intubation.
Laryngoscopes are designed to aid in intubation by allowing for ideal positioning of the airway for intubation and provision of a light source for better visualization of the airway. Laryngoscopes consist of a handle and a blade. Blades are interchangeable and the anesthetist should choose a blade that is a good size and shape for the patient being anesthetized. Straight Miller blades or curved Macintosh blades are effective for most dogs and cats. However, many shapes, sizes, and designs are available depending on the preferences of the anesthetist. Prior to induction of anesthesia, the anesthetist should ensure that the laryngoscope is present, with the correct blade, and that the light is functional. When utilizing the laryngoscope for intubation, the blade is inserted into the mouth and placed over the base of the tongue. The anesthetist should place gentle downward pressure on the base of the tongue, and this will cause the epiglottis to lower, allowing the anesthetist to visualize the airway. The laryngoscope should not be placed directly onto the epiglottis as this can cause damage to the epiglottis.
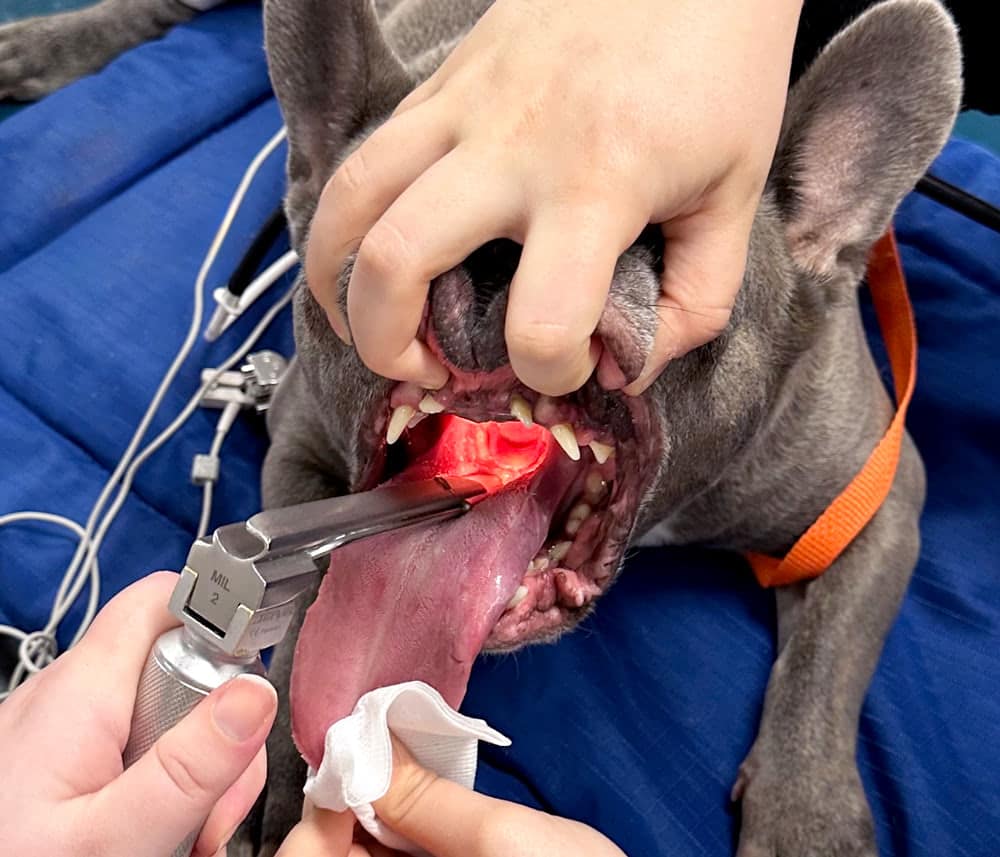
Once the anesthetist is confident that they have everything prepared for intubation, induction of anesthesia can be performed. When the patient is deemed adequately anesthetized for intubation, the preoxygenation facemask is removed from the face and the mouth is opened by lifting the maxilla and pulling the tongue straight out between the lower incisors. Pulling down on the tongue will lower the mandible and open the mouth maximally for intubation. If the patient is feline, the anesthetist may at this point consider placing a few drops of lidocaine directly onto the larynx to help prevent laryngospasm. As the lidocaine takes some time to start working the patient’s head is then placed back into the facemask with 100% oxygen to allow a few seconds for the lidocaine to start working. When ready to intubate, the endotracheal tube is then gently inserted over the epiglottis and between the arytenoids. If resistance is met and the tube is deemed to be too large, then a smaller tube should be selected. If resistance is met at any time during the intubation process, the anesthetist should never force the endotracheal tube into the airway. The tube should pass easily into the trachea if it is an appropriately sized tube for the patient.
Following intubation, it is critical that the anesthetist ensure that the endotracheal tube is indeed in the airway and not in the esophagus. There are several ways to achieve this:
Proper insertion depth should be checked utilizing the depth markers on the endotracheal tube and the pre-determined insertion length. If the tube was not premeasured as described above, then the anesthetist can gently palpate the trachea at the level of the thoracic inlet and ensure that the tip of the endotracheal tube is palpable at this level. This method is not preferred as palpation and movement of the tube in the trachea can cause damage to the tracheal mucosa. Further confirmation of correct depth is achieved by administering a positive pressure breath and ausculting both sides of the chest for breath sounds. If breath sounds are only present on one side of the chest, then the tube is likely inserted too deep.
The endotracheal tube should exit the front of the mouth between the incisors and not the side of the mouth. The tube can then be secured utilizing a tube tie. The tube tie is generally secured first around the tube and then to the patient’s head. When securing the tie to the tube, the tie should be snug, but not too tight. If the tie is secured too tightly around the tube, it can result in collapse of the tube and airway restriction/obstruction as the tube plastic warms and softens in the patient’s mouth. The most secure place to secure the tube tie to the patient is behind the head caudal to the ears. If this is not possible, then the tube tie can be secured over the nose. Disadvantages to securing over the nose include the potential for affecting circulation to the nose if the tube is tied too tightly and the patient is more easily inadvertently extubated with the tie in this position.
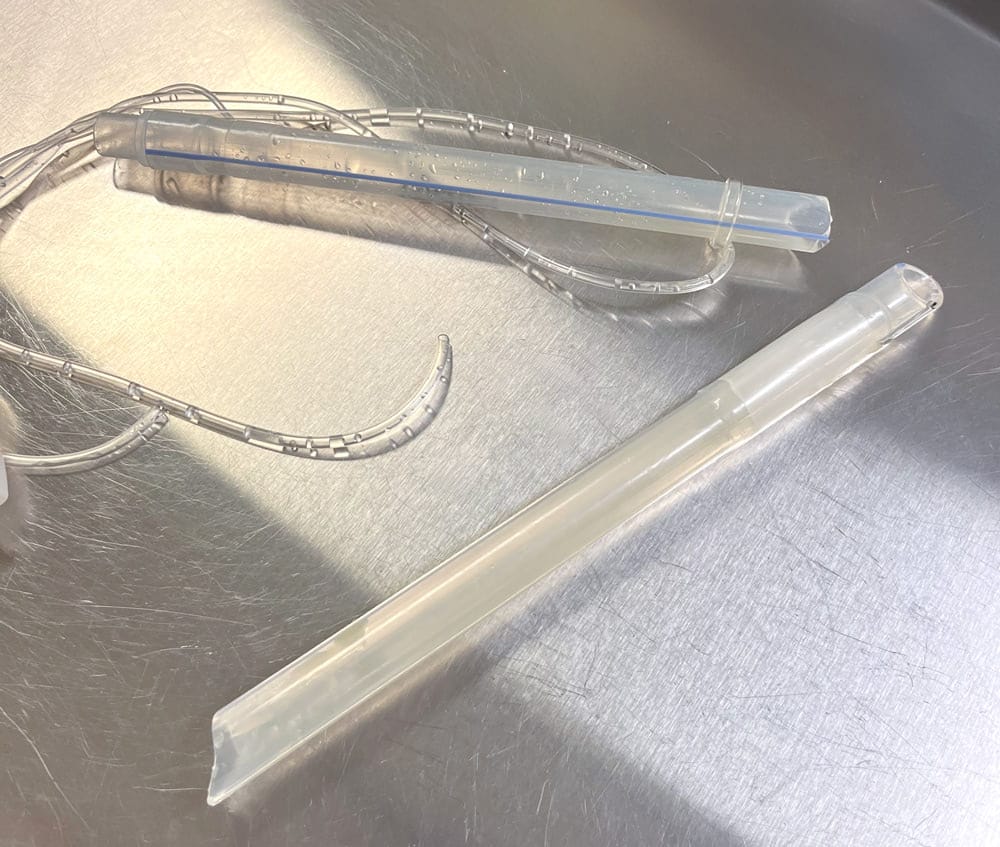
After securing the tube, the anesthetist should inflate the cuff to ensure there is no leak at a peak inspiratory pressure of 15-20 cmH2O. There are three reasons that a leak proof seal in the airway is necessary:
Inflation of the cuff should be performed thoughtfully and with the simple goal of preventing an audible leak around the cuff when a positive pressure breath is administered to 15-20cmH2O. It is critical that the anesthetist avoid overinflation of the cuff as this can result in ischemic injury to the tracheal mucosa or, in severe scenarios, tracheal rupture. Proper inflation of the cuff should be performed by first administering a positive pressure breath and listening for a leak. If the tube size was perfect for the patient, there will be no leak, and no air should be added. If a leak is heard, then a small amount of air that makes sense based on the size of the tube (e.g. 0.5 mL for 3-5 mm internal diameter tube, 1-2 mL for a 6-14 mm internal diameter tube) should be added to the cuff and then the process repeated until the leak is no longer heard. If the anesthetist is unable to achieve a leak-proof seal after repeating the process 3-4 times, then the anesthetist should consider placement of a larger endotracheal tube.
After the patient is intubated and the cuff is inflated, care should be taken to minimize movement of the tube within the trachea. Excessive movement of the tube in or out of the airway or twisting of the tube within the airway can result damage to tracheal mucosa or tracheal tears. Whenever moving the patient, it is ideal to disconnect from the breathing circuit so that the endotracheal tube is not pulled, pushed, or twisted by the circuit. When the patient is moving around the hospital, it is important that someone be constantly aware of the endotracheal tube. This is generally achieved by having one person keep a hand on the tube at all times.
During the anesthetic event, it is possible that fluid and/or debris can end up in the mouth. Examples include, regurgitation of gastric contents, fluid and debris following dental cleaning, blood following oral or maxillary surgery, and sometimes gauze in the back of the mouth that was placed to prevent secretions from entering the airway. At the end of the anesthetic event, the anesthetist should inspect the oral cavity carefully utilizing a laryngoscope to ensure that the oral cavity and airway are clear and that the patient will be able to breathe without risk of airway obstruction or aspiration following extubation.
In preparation for extubation, the patient should ideally be placed in sternal recumbency with the head elevated and the nose pointing down. The endotracheal tube should exit the mouth between the incisors as stated above. As the patient wakes up from anesthesia, if the tube exits the mouth from the side, the patient could easily bite through the endotracheal tube and then aspirate the patient end of the tube.
This is easily avoided by simply keeping the tube between the incisors. When the patient is swallowing and the anesthetist is confident that the patient can protect their own airway, the cuff should be deflated and the endotracheal tube carefully pulled straight out between the incisors.
Proper patient airway management requires consideration of multiple factors and constant diligent attention to the patency of the airway, the position of the endotracheal tube, and the pressures exerted on the trachea. With the proper knowledge and skills patient airways can be successfully managed without complication.


Veterinary Specialist Articles